For as long as I’ve used Pinterest, it’s always been my go-to for design resources (because I’m a graphic designer on the side) and my go-to source of inspiration for native attire. It might be likewise for you too; maybe it’s your favorite place for viewing the latest recipes, DIY projects, stunning wedding dresses, or your favorite portfolio site for your creative projects.
But that’s not all that Pinterest is known for; Pinterest is much more than a visual search hub or engine.
For a platform with about 463 million monthly active users (MAUs) worldwide, up by 13 million users compared to the previous quarter, there’s no doubt that Pinterest is a goldmine for bloggers.
In this article, we compile all the necessary steps to start blogging on Pinterest, plus some best practices to help you get results.
Blogging on Pinterest: A Myth or Fact
Blogging on Pinterest is not a myth. It’s not a cunningly devised strategy for marketing. It is real, and it works. For example, Shreya Dalela helped a company, ECM increase their Pinterest audience By 829% In Three Months using Pinterest blogging techniques.
First things first….
- How Pinterest works: The fundamentals
How does Pinterest work? It is a social media platform with an image-based concept, inviting its members, or Pinners as commonly called in the community, to express themselves by creating pinboards – a modern-day virtual mood board.
Pinners use the platform to organize and share images (or pins), inspiring themselves and fellow users. Popular pinboard themes range from recipes and DIY to fashion and lifestyle. Pinterest has introduced the ability to save GIFs and videos; however, it remains principally a type of search engine for images.
Some terminologies to keep at heart as you read this article:
- Pins:
Pins are bookmarks saved by users on Pinterest. They can be an image or video. You can also upload your pictures/videos as pins. - Boards:
A group of pins make a board. It’s like a folder where you can save the pins you love. You can create multiple boards and organize them in your profile. - Pinterest feed
Your Home feed is a feed of Pins that have been picked for you based on the boards you create, Pins you engage with, and things you search for on Pinterest.
Beginner’s step-by-step guide on Pinterest Blogging
You don’t need tens of tactics to start blogging on Pinterest, you need the first principles embedded in different steps, and that’s what we have for you below, showing you every detail of your next step of action when setting up your account for blogging:
Set Up Your Pinterest Account
Creating a Pinterest Business Account: Step-by-step Guide
The first step to kick-start your blogging journey on Pinterest is to create a business account profile. Pinterest business accounts are free to create. It gives you access to sales-minded features such as analytics. If you already have a free account, you can switch to a business account. But then, if you don’t have a Pinterest account, you can create a business account directly from scratch.
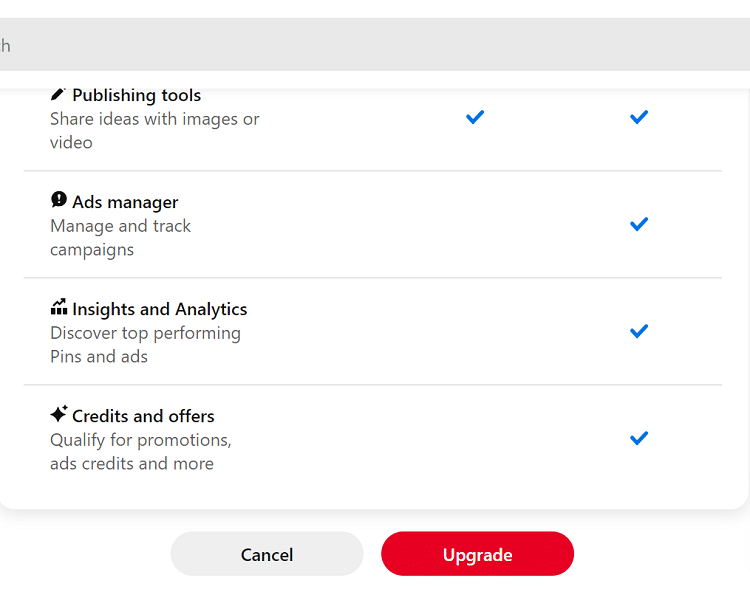
Well, what’s the difference between a free Pinterest account and a business account? Looking at the clear comparisons below, you’d understand why a business account is preferable for blogging on Pinterest.
For a free Pinterest account, you only get access to publishing tools, but for a business account, you get access to all featured.
Here are the steps to take to create a business account:
- If you have a personal account prior, you must log out before signing up for a business account. Go to pinterest.com/logoutHowever, you can also convert your personal account directly to a business account.All you need to do is go to pinterest.com/business/convert/, where you will be directed to fill out your business details.
But why is it important to convert to a business account rather than creating a fresh one?
It’s because you already have followers, and if you convert, you still get them back — this means you get more views on your blog.
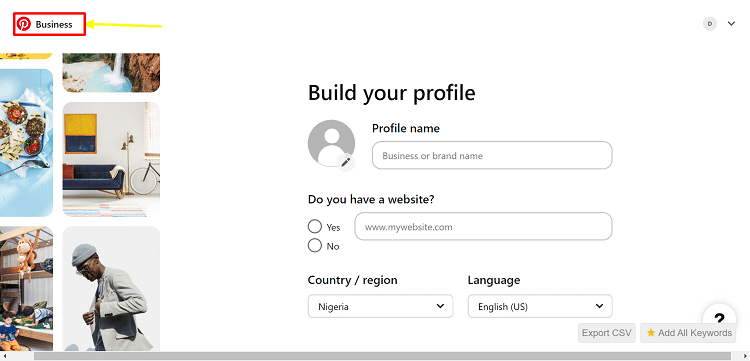
- Next up, create a Pinterest business account
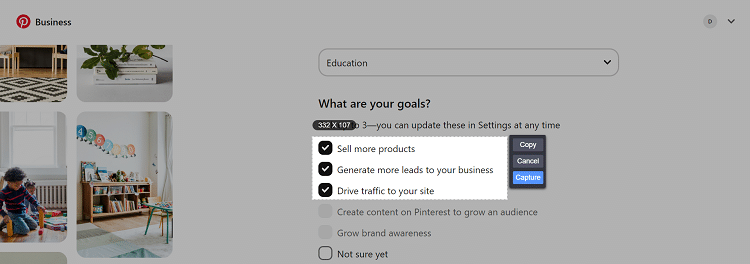
The good thing I love about the whole step is that you can describe your business and choose your business goals — this gives you a standard fit and focused features to help you get results.
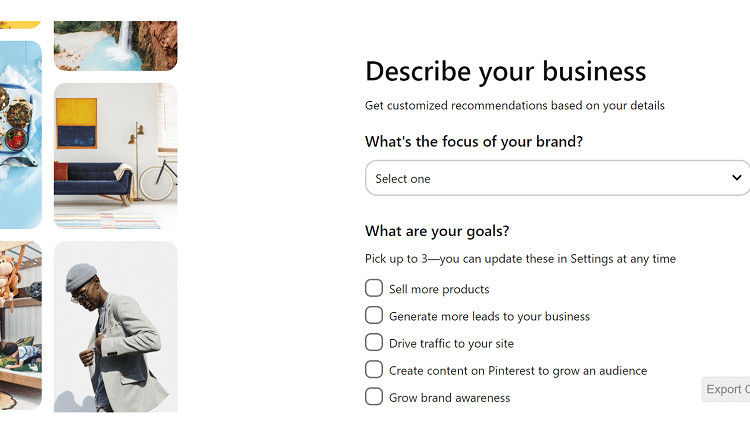
For me, I picked the first three, but then I advise you to pick “create content on Pinterest” While it’s tempting to select all (spoiler alert; you are not allowed to), just try and pick the relevant goals.
Once you complete all the required details, you will have successfully created your account. When you are done, here’s a snippet of what you will see:

Note: Fill with very detailed information — a great username, an SEO-friendly bio and add your profile picture to add a spice of professionalism.
Claim your website
The next step is claiming your website. This is important because you need to:
- Tack the Analytics of your Pinterest content.
- Track website engagements
All you have to do is to click the three dots in the top right corner of your newly created or converted Pinterest account (business, account).
Click Settings and click claimed accounts. It will show you a notification like this.
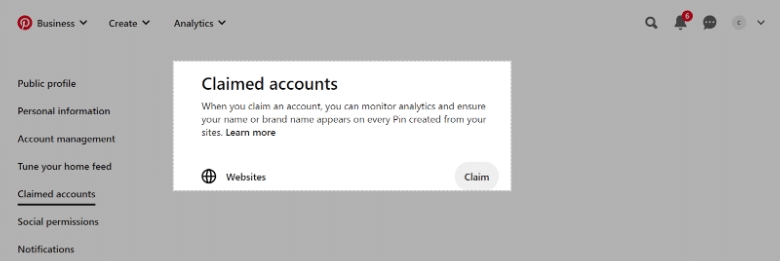
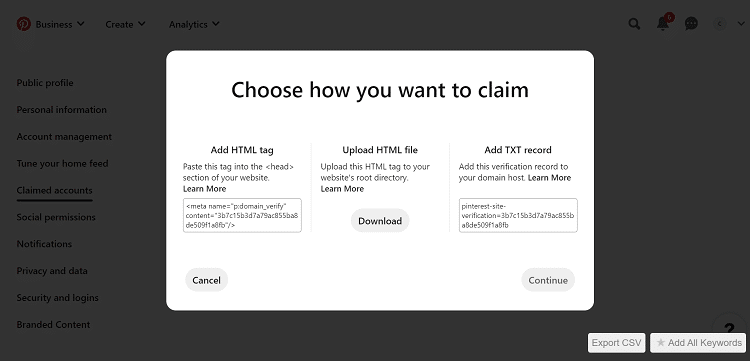
Next, you click Claim and follow the following instructions on how to claim your website.
Create boards and name a board after your blog.
The next step on your journey to becoming a Pinterest blogger is to create boards — A group of pins.
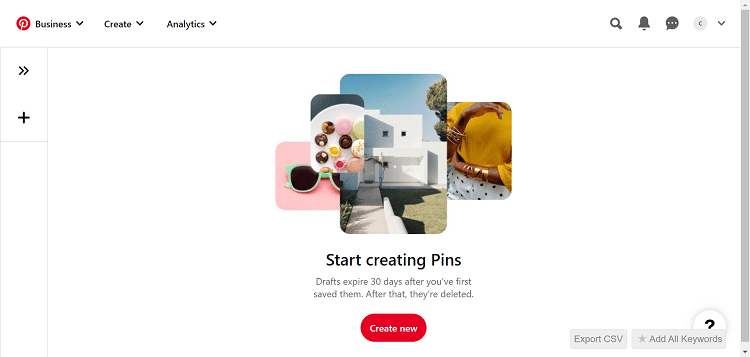
Tap your profile picture at the bottom-right of your screen to open your profile, then tap the plus icon at the right side of the search bar.
But then, you might see a notification like this because you don’t have any pins. So, it would be best if you created a pin before having a board because a board is made up of many pins.
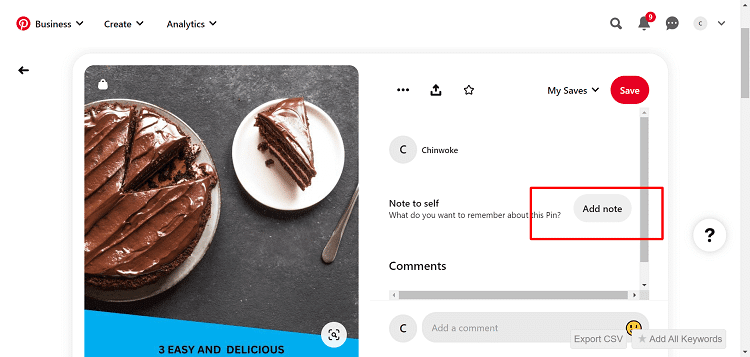
You can make pins without hassle. You can use Canva to create an image to illustrate precisely what you are trying to offer.
You can create a Pin by uploading an image from your mobile device. Once you’ve published your Pin, you can edit or delete the Pin at any time
Add a title, description, destination website and alt text. You can mention up to 5 accounts on Pinterest in your description by typing “@” and then their usernames
After saving your pins, go back to your profile feed and go to your business hub. Then click the plus button on the page, and you’ll see a pop-up — “create board.”
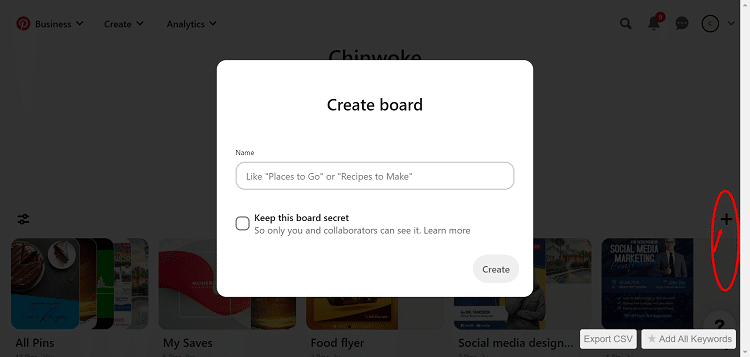
Now, choose a name for your board. Ensure you select a name that rhymes with what you want to offer as a unique value proposition on your blog.
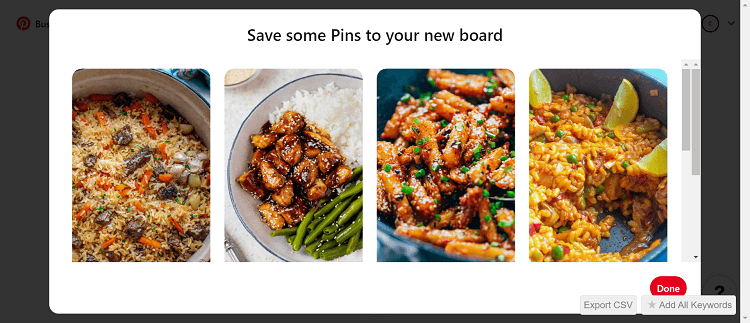
For example, I chose food recipes. When I clicked “create”, I saw a pop-up of suggested pins that I could save and these pins are significantly related to what I want to offer
Pro tips for creating boards and pins
- Create many boards: Have a blog for every Pinterest keyword you wish to target. Don’t quickly forget that Pinterest is a search engine. So, when creating these boards, think about keywords that match the intent of your customers
- When I spoke to SimplyAlexJean, a professional Pinterest blogger and manager, she told me that it is crucial to Pin consistently and start slow – 1 pin a day publish for three months before increasing to 2 a day (and so on) and Include a Call to Action on each pin to entice readers.
- Your pins should be eye-catching, using a quality image for all your pins.
Apply for rich pins
Rich Pins are Pins that automatically sync information from your site. You can identify rich Pins by the extra information above and below the image when you click on the Pin. If something changes on the original site, the rich Pin periodically updates to reflect that change
With rich pins, you can draw metadata from your website. Remember, it’s relevant that you know SEO ranking factors when doing this. Now, you need SEO plugins like Yoast to organize metadata on your articles.
Once you get your metadata — all the information about a page you send to a search engine that isn’t visible to your visitors — install Pinterest Rich Pins.
Go to the Rich Pin validator and enter the link and click the validate button. After this, click on approval and then click apply again when a pop-up of your HTML tags comes up.
Rich pins make your blog stand out and make your content more searchable.
Engage and collaborate with Pinterest communities
You are not blogging on Pinterest just to be called “a Pinterest blogger “, no. You are leveraging this app because you want your brand’s comprehensive visibility. You want to attract qualified leads and build relationships with them.
So, you don’t need to stop creating pins and boards; you need to go the extra mile — join a group board, collaborate with influencers and fellow creators and engage with your audience.
While joining groups, obey the rules of every group you join and follow each instruction diligently so you don’t paint a bad image of your brand.
Pinterest Blogging Best Practices in 2024
- Optimize your profile — Apply best SEO practices for this in your bio and profile description. If you ignore this, your profile won’t appear in the search.
- Use your relevant keywords — Pinterest works more like a search engine than a social media platform. When you include keywords in your titles, descriptions, and your board names, this can help improve your visibility and brand reach.
Do you remember the ECM result I shared earlier? Good, At ECM, the articles were written and optimized for Google SEO. Mapping the articles to relevant Pinterest keywords was very helpful in driving organic traffic from the platform. - Use a professional profile picture that positions you as a professional in your industry; make it portrait and clear.
- Create many Pins for the same blog post: This helps you to test out different images and descriptions to see what works best.
- Always use relevant hashtags as a Pinterest blogger. Pinterest hashtags can make or break your Pinterest marketing strategy. When used correctly, Pinterest hashtags can help your posts get seen by more people who are interested in your brand or product.
- Don’t underrate High-Quality Images: Make sure you use pins with high-resolution, visually appealing bliss. Vertical images perform better than horizontal ones because they occupy more screen space.
- Be consistent in pinning. Pinterest loves active users and favors them for their efforts through the algorithm.
- HubSpot’s annual State of Video Marketing survey with Wyzowl shows that 91% of businesses use video as a marketing tool, more than any of the previous years since the surveys started — So, experiment with video Pins. Experiment with video snippets of your blog posts or teaser clips to attract more attention and prime the emotions of your audience
- Promote your Pinterest content on other social media platforms. This is the era of dark social, where the value of content can’t easily be tracked to one channel, so always include links to your Pinterest profile on your other social media platforms and your blog.
- Be human and always Show, don’t tell — Show the Human Side: Share your behind-the-scenes images or share your thoughts, experiences, and processes for work
“If you’re just getting started with your blog and want to use Pinterest Marketing to grow it, I strongly recommend that you invest time in learning about Pinterest trends, as the demand for content varies according to the season. You can also grow your account by planning your content for these seasonal trends”, so said Shreya, the founder of The Creatives Hour, who has been managing the Elite Content Marketer (ECM) Pinterest account.
Why do bloggers use Pinterest?
Bloggers utilize Pinterest as a tool to showcase content, increase website traffic and expand their audience. Pinterest operates as a search engine allowing users to discover content through the images they encounter.
Concluding thoughts
I believe you are on the right step to becoming a Pinterest blogger with these first principles. There’s so much for your brand to earn as goals on Pinterest beyond what you’ve imagined. Be consistent and strategic!