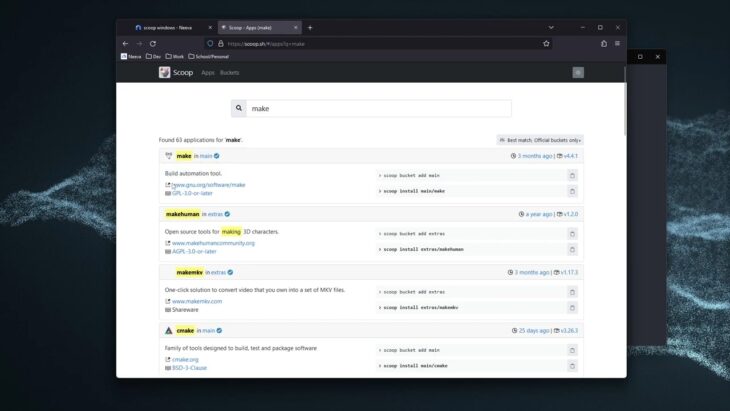
If you’ve spent any time dabbling in programming, you might have heard of the utility called “Make.” Hailing from the Unix environment, this utility streamlines the process of building programs from source code. But what about Windows users? Are they left out in the cold? Absolutely not! In this guide, I’ll walk you through everything you need to know to install and use Make in a Windows environment.
Table of Contents
ToggleWhat Is “Make” and Why You Need It

Make is a utility that automatically builds executable programs and libraries from source code. Initially developed for Unix-based systems, Make reads files called Makefiles to determine what actions are needed to build your project.
In essence, Make saves you time by automating a series of commands you’d otherwise need to type manually every time you want to compile or update your project.
Why Windows Users Should Care
If you’re a Windows user, you might think that Make is irrelevant to your workflow. After all, IDEs like Visual Studio offer automated build processes. However, Make offers platform-agnostic scripting and is widely used in open-source projects.
Just as it’s essential to ensure your software tools are functioning optimally, it’s equally crucial to check the health of your hardware components.
Knowing how to use Make can greatly expand your reach as a developer, allowing you to work seamlessly across different operating systems and with diverse teams.
Additionally, understanding the broader landscape of software development, including aspects like software development outsourcing, can provide a more comprehensive view of the industry.
Prepping Your Windows Environment
Before you can install Make, you’ll need to ensure that your Windows environment is properly set up.
While Windows doesn’t come with a native command-line interface compatible with Unix utilities, there are several workarounds available that let you mimic a Unix-like environment.
Essential Tools
- Command Prompt: This is the built-in command-line interface in Windows. However, it lacks many Unix-like functionalities.
- Windows PowerShell: Another built-in utility with advanced scripting features but still lacking Unix-like capabilities.
- Git Bash: Provides Git command-line features and a Bash emulation environment.
- Windows Subsystem for Linux (WSL): Allows you to run a Linux distribution on your Windows machine.
Installation Methods

Now that your Windows environment is prepped, you can choose from several methods to install Make. Each method comes with its own set of pros and cons, which we’ll discuss to help you make an informed decision.
Package Managers and More
For installing Make on Windows, you generally have three options: Chocolatey, Cygwin, and WSL. Let’s explore each of these in detail.
1. Chocolatey
Chocolatey is a package manager for Windows, allowing you to install software from the command line. To install Make, you’d first install Chocolatey and then run choco install make.
# Install Chocolatey
Set-ExecutionPolicy Bypass -Scope Process -Force; [System.Net.ServicePointManager]::SecurityProtocol = [System.Net.ServicePointManager]::SecurityProtocol -bor 3072; iex ((New-Object System.Net.WebClient).DownloadString(‘https://chocolatey.org/install.ps1’))
# Install Make
choco install make
Why Choose Chocolatey?
- It’s simple and straightforward.
- You can manage all your software installations through Chocolatey, not just Make.
2. Cygwin
Cygwin provides a large collection of GNU and Open Source tools that offer functionality similar to a Linux distribution on Windows. To install Make, download the Cygwin installer and select the ‘Devel’ category to find and install the ‘make’ package.
Why Choose Cygwin?
- It provides a robust Unix-like environment on Windows.
- You can install a multitude of other development tools along with Make.
3. Windows Subsystem for Linux (WSL)
WSL lets you run a Linux distribution alongside your existing Windows installation. Once you have a Linux distribution installed via WSL, installing Make is as simple as running sudo apt-get install make.
Why Choose WSL?
- Provides a native Linux environment, ensuring maximum compatibility.
- Ideal for those who work with both Windows and Linux systems.
Getting Started: Your First Makefile
A Basic Makefile
Once Make is installed, the next step is to create a Makefile. A Makefile is essentially a script that Make reads to know which commands to execute. Here’s a simple example Makefile for compiling a C program.
all:
gcc main.c -o main
Running Your Makefile
Navigate to the directory containing your Makefile and run make in the terminal. This will execute the commands defined under the all target in the Makefile, resulting in the compilation of your C program. You should see a new executable file named main in your directory.
Advanced Techniques
Variables and Wildcards
Makefiles can use variables and wildcards for more dynamic and modular scripts. For instance, using variables, you can define your compiler and source files at the top of the Makefile for easier adjustments later.
Patterns and Functions
Make also supports pattern matching and functions like $(patsubst …). This allows for very complex build logic if needed, enabling the automation of tasks ranging from file conversion to deployment procedures.
Common Pitfalls and Troubleshooting
Beware of Indentation
One common pitfall when writing Makefiles is indentation. Makefiles require tabs for indentation, not spaces. Mixing the two can result in confusing errors.
Debugging and Help
- Use make -n to print the commands that would be executed but not actually run them.
- Use make –debug to print debug information, helping you trace any issues.
Additional Resources

Get Hands-On Experience
If you’re new to Make or just looking to deepen your understanding, there are plenty of tutorials and sample projects available online. From simple hello-world examples to complex build systems, hands-on practice is one of the best ways to become proficient.
Further Reading
- GNU Make Manual: This is the definitive guide and well-worth reading for anyone serious about mastering Make.
- “Managing Projects with GNU Make” by Robert Mecklenburg: An excellent book that dives into more advanced topics.
Community Support
If you’re stuck, don’t hesitate to seek help from the community.
- Stack Overflow: You’ll find a wealth of knowledge and troubleshooting tips here.
- Reddit /r/programming: A good place to ask questions and share your knowledge.
Your Next Steps
Practice, Practice, Practice
As with any tool or language, the key to mastery is consistent practice. Try using Make in your personal projects or contribute to open-source projects that use Make. The more you use it, the more you’ll understand its nuances and capabilities.
Stay Updated
Make is a mature tool, but it still gets updated with new features and improvements. Subscribe to mailing lists or follow relevant forums to keep yourself updated.
Share Your Knowledge
If you’ve successfully installed and used Make on your Windows system, why not help others? Whether it’s helping a colleague at work or answering questions online, sharing your knowledge is a great way to reinforce your own understanding and contribute to the community.
FAQs

Can I Use Make with Languages Other than C/C++?
Absolutely! While Make is traditionally associated with C and C++ development, it’s a language-agnostic tool.
You can use it to build projects in Python, Java, JavaScript, and many other programming languages. You just need to specify the appropriate build and compile commands in your Makefile.
Is Make Compatible with IDEs like Visual Studio?
Yes, Make can work alongside IDEs like Visual Studio. While many IDEs have their own build systems, you can usually configure them to use an external build system like Make.
This can be particularly useful if you are collaborating with others who are using different development environments.
What’s the Difference Between Make and Build Automation Tools like Maven or Gradle?
Make is a general-purpose build automation tool, while Maven and Gradle are more specialized and tailored for the Java ecosystem.
Make provides a low-level way to define build rules and dependencies, offering more flexibility but requiring more manual configuration. On the other hand, Maven and Gradle come with built-in conventions and libraries designed specifically for easier Java project management.
Can I Run Multiple Make Commands Concurrently?
Yes, you can run multiple Make commands concurrently by using the -j option followed by the number of jobs to run simultaneously.
For example, make -j4 will run up to 4 tasks concurrently. This can significantly speed up the build process for large projects.
How Do I Uninstall Make from My Windows System?
The uninstallation process depends on how you installed Make:
- Chocolatey: Run choco uninstall make in the command prompt.
- Cygwin: Open the Cygwin setup program, navigate to the ‘Devel’ category, and set the ‘make’ package to ‘Uninstall’.
- WSL: Run sudo apt-get remove make in the Linux terminal.
Is there a GUI for Make to Make it Easier to Create Makefiles?
While Make itself is a command-line tool, there are third-party GUIs available that help you create Makefiles.
Some IDEs also offer graphical interfaces for Makefile management. However, these are not part of the Make tool itself and may require additional installation and setup.
Final Words
Installing and using Make on Windows isn’t as straightforward as on Unix-based systems, but the flexibility and automation it offers are well worth the effort. You’re now equipped with the knowledge to install Make through various methods and to start automating your build processes.
The possibilities with Make are virtually endless. Whether you’re a student, a hobbyist, or a seasoned developer, mastering Make will elevate your development workflow to a new level. So go on, create, compile, and never stop “making.”

